3) java build path : Classpath 클릭 후 우측 add library 클릭 > junit 4로 연결 apply
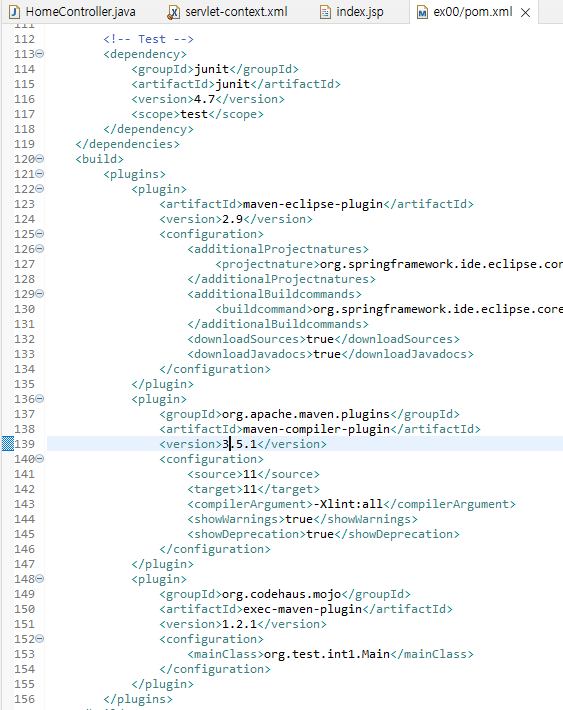
2. spring 프레임워크 버전 수정 - pom.xml에서
<properties> 안에
1) java-version : 11
2) spring-framework-version : 5.0.7
두번째 plugin 안에
3) version : 3.5.1
4) source, target : 11
3. mysql jar 연동
ㄴ> pom.xml 에 <dependency> 추가
ㄴ> mysql db 생성
ㄴ> class파일 생성(MySQLConnectionTest)
ㄴ> junit test
4. lombok
ㄴ> 설치 : spring 연결
ㄴ> pom.xml 에 <dependency> 추가
5. mybatis 연동
ㄴ> pom.xml 에 <dependency> 추가
ㄴ> src / main / webapp / WEB-INF / spring / root-context.xml
1) Namespaces 에서 4개 체크(beans, context, jdbc, mybatis-spring)
2) Source 에서 아래 코드 추가
<!-- Root Context: defines shared resources visible to all other web components -->
<bean id="dataSource" class="org.springframework.jdbc.datasource.DriverManagerDataSource">
    <property name="driverClassName" value="com.mysql.jdbc.Driver"></property>
    <property name="url" value="jdbc:mysql://localhost:3306/spring"></property>
    <property name="username" value="root"></property>
    <property name="password" value="1111"></property>
</bean>

<!-- 추가 구문 -->
<bean id="sqlSessionFactory" class="org.mybatis.spring.SqlSessionFactoryBean">
    <property name="dataSource" ref="dataSource"></property>
    <!-- 두번째 추가 구문 -->
    <property name="configLocation" value="classpath:/mybatis-config.xml"></property>
</bean>
ㄴ> class파일 생성(DataSourceTest)
ㄴ> junit test
ㄴ> root-context.xml 추가 구문 입력
ㄴ> main/resources 에 mybatis-config.xml 생성
ㄴ> root-context.xml두번째 추가 구문 입력
ㄴ> class 파일 생성(MybatisTest)
ㄴ> junit test
6. mappers 패키지 생성
ㄴ> src/main/resources
기본 구성
[ src/main/java ] --> 작성되는 코드의 경로 - 프로젝트 만들때 작성한 경로 자동으로 생성(org.zerock.controller) - org.zerock.controller 에 class 생성할 것!! - 기본 생성 : HomeController.java ㄴ> forward index
<HomeController.java >
package org.zerock.controller;

import java.text.DateFormat;
import java.util.Date;
import java.util.Locale;

import org.slf4j.Logger;
import org.slf4j.LoggerFactory;
import org.springframework.stereotype.Controller;
import org.springframework.ui.Model;
import org.springframework.web.bind.annotation.RequestMapping;
import org.springframework.web.bind.annotation.RequestMethod;


@Controller
public class HomeController {

	private static final Logger logger = LoggerFactory.getLogger(HomeController.class);


	@RequestMapping(value = "/", method = RequestMethod.GET) // get 방식이라면 안에 있는것을 실행하겠다
	public String home(Locale locale, Model model) {
		logger.info("Welcome home! The client locale is {}.", locale);

		Date date = new Date();
		DateFormat dateFormat = DateFormat.getDateTimeInstance(DateFormat.LONG, DateFormat.LONG, locale);

		String formattedDate = dateFormat.format(date);

		model.addAttribute("serverTime", formattedDate );
		// request.setattribute 대신 사용

		return "index"; // index.jsp 에 serverTime 전달(forward할때 수정)
	}

}
[ src/main/resources ] --> 실행할 때 참고하는 기본 경로(주로 설정 파일) - 기본 생성 : log4j.xml - mybatis-config.xml
< mybatis-spring > 1. mybatis ㄴ> sql, mapping 프레이워크로 별도의 설정파일 가질 수 있음 ㄴ> 자동으로 connection close(); 처리 ㄴ> 내부적으로 PreparedStatement 처리 ㄴ> 리턴 타입을 지정하는 경우 자동으로 객체 생성 및 RestulSet 처리 ㄴ> 가장 핵심적인 객체 : SQLSession 이라는 존재와 SQLSessionFactroy 1) SQLSessionFactroy : 내부적으로 SQLSession 이라는 것을 만들어 내는 존재. 2) SQLSession를 통해 Connection 을 생성하거나 원하는 SQL 을 전달하고, 결과를 리턴 받는 구조로 작성
2. mybatis-spring 연동 ㄴ> 연동 작업의 핵심 : Connecton 생성, 처리하는 SQLSessionFactroy의 존재 ㄴ> SQLSessionFactroy : 데이터베이스와의 연결과 SQL의 실행에 대한 모든 것을 가진 가장 중요한 객체
[ src/test/java ] --> 테스트 코드를 넣는 경로 (변경 후 Run as > Junit test 하기) - MySQLConnectionTest.java : mysql 연결 테스트 (01) - DataSourceTest.java : beans, context, jdbc, mybatis-spring source 수정후 테스트 (02) - MybatisTest.java : mybatis 테스트 (03)
[ src/test/resources ] --> 테스트 관련 설정 파일 보관 경로 - 기본 생성 : log4j.xml
[ Maven Dependencies ] --> jar 파일 모아놓는 폴더 - pom.xml 에 jar 파일 maven에서 복사한 내용을 적으면 설치됨 (생성됐는지 확인만 하면 됨)
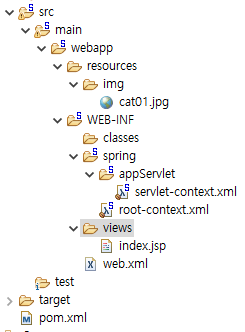
[ src ] --> jsp, xml 파일 경로 [ main / webapp ] [ resources ] - img 폴더 , css 등등 [ WEB-INF ] [ classes ] [ spring ] [ appServlet ] - servlet-context.xml root-context.xml [ views ] : index.jsp web.xml [ test ]
< servlet-context.xml >
ㄴ> resources, forward 담당
<?xml version="1.0" encoding="UTF-8"?>
<beans:beans xmlns="http://www.springframework.org/schema/mvc"
	xmlns:xsi="http://www.w3.org/2001/XMLSchema-instance"
	xmlns:beans="http://www.springframework.org/schema/beans"
	xmlns:context="http://www.springframework.org/schema/context"
	xsi:schemaLocation="http://www.springframework.org/schema/mvc https://www.springframework.org/schema/mvc/spring-mvc.xsd
		http://www.springframework.org/schema/beans https://www.springframework.org/schema/beans/spring-beans.xsd
		http://www.springframework.org/schema/context https://www.springframework.org/schema/context/spring-context.xsd">

	<!-- DispatcherServlet Context: defines this servlet's request-processing infrastructure -->

	<!-- Enables the Spring MVC @Controller programming model -->
	<annotation-driven />

	<!-- Handles HTTP GET requests for /resources/** by efficiently serving up static resources in the ${webappRoot}/resources directory -->
	<resources mapping="/**" location="/resources/" />

	<!-- Resolves views selected for rendering by @Controllers to .jsp resources in the /WEB-INF/views directory -->
	<beans:bean class="org.springframework.web.servlet.view.InternalResourceViewResolver">
		<beans:property name="prefix" value="/WEB-INF/views/" /> <!-- forward 주소 -->
		<beans:property name="suffix" value=".jsp" />
	</beans:bean>

	<context:component-scan base-package="org.zerock.controller" />


</beans:beans>
package org.zerock.controller;

import javax.servlet.http.HttpServletRequest;

import org.slf4j.Logger;
import org.slf4j.LoggerFactory;
import org.springframework.stereotype.Controller;
import org.springframework.ui.Model;
import org.springframework.web.bind.annotation.ModelAttribute;
import org.springframework.web.bind.annotation.RequestMapping;

@Controller
public class SimpleController {

	@RequestMapping("doA")
	public void doAget() {
		// void는 리턴값이 없으므로 doA.jsp라는 주소값을 forward함
	}
}
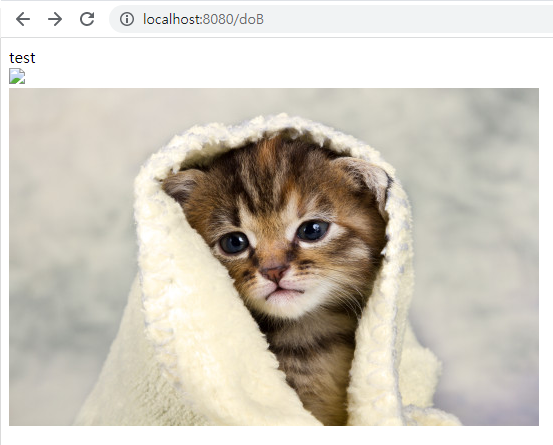
2. String
: return 값 o --> 주소값은 doB이지만, forward는 return 값으로
<SimpleController.java >
package org.zerock.controller;

import javax.servlet.http.HttpServletRequest;

import org.slf4j.Logger;
import org.slf4j.LoggerFactory;
import org.springframework.stereotype.Controller;
import org.springframework.ui.Model;
import org.springframework.web.bind.annotation.ModelAttribute;
import org.springframework.web.bind.annotation.RequestMapping;

@Controller
public class SimpleController {

    @RequestMapping("doB")
        public String doBget() {
            return "index"; // return 이 있다면 return의 값.jsp로 forward
        }
}
주소값은 doB이지만 보여지는건 forward 된 index
변수 전달
주소?변수=값 --> java든 뭐든 그 변수를 받아야함(String msg)
★ 변수 전달하는 방법★
1) String msg 변수를 받아서 어노테이션 사용
public String doBget(@ModelAttribute("msg") String msg) {
		logger.info("msg:"+msg); // console에 적힘

		return "index"; // return 이 있다면 return의 값.jsp로 forward
	}
}
2) Model 객체 사용하기
@RequestMapping("doB")
	public String doBget(Model model) {  // model 클래스 타입으로 model 객체 생성
		logger.info("msg:"+msg); // console에 적힘
		model.addAttribute("mmm", msg); // msg라는 객체를 mmm이름으로 추가

		return "index"; // return 이 있다면 return의 값.jsp로 forward
	}
}
<SimpleController.java >
package org.zerock.controller;
import javax.servlet.http.HttpServletRequest;
import org.slf4j.Logger;
import org.slf4j.LoggerFactory;
import org.springframework.stereotype.Controller;
import org.springframework.ui.Model;
import org.springframework.web.bind.annotation.ModelAttribute;
import org.springframework.web.bind.annotation.RequestMapping;
@Controller
public class SimpleController {
private static final Logger logger = LoggerFactory.getLogger(SimpleController.class);
@RequestMapping("doB")
public String doBget() {
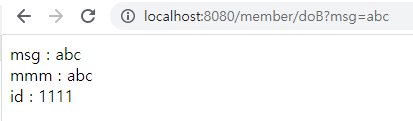
logger.info("msg:"+msg); // console에 적힘
model.addAttribute("mmm", msg); // msg라는 객체를 mmm이름으로 추가
model.addAttribute("id", "1111"); //1111 value를 id이름으로 추가
return "index"; // return 이 있다면 return의 값.jsp로 forward
}
}
=======console ========
INFO : org.zerock.controller.SimpleController - msg:abc
< index.jsp >
<%@ page language="java" contentType="text/html; charset=UTF-8" pageEncoding="UTF-8"%>

<!DOCTYPE html>
<html>
<head>
<meta charset="UTF-8">
<title>Insert title here</title>
</head>
<body>
<!-- el 사용 -->
msg : ${msg} <br>  <!-- msg 객체 -->
mmm : ${mmm} <br>  <!-- msg 객체가 담겨져 있는 mmm -->
id : ${id} <br>    <!-- 1111이란 값이 담겨져 있는 id -->

</body>
</html>
★ 정리 ★
Model : 객체 ㄴ> Controller 에서 생성된 데이터를 담아 View 로 전달할 때 사용하는 객체 ㄴ> Servlet의 request.setAttribute() 와 비슷한 역할을 함 ㄴ> addAttribute("key", "value") 메서드를 이용해 view에 전달할 데이터를 key, value형식으로 전달
@ModelAttribute("파라미터명") ㄴ> 요청 파라미터를 받아서 필요한 객체를 만들고 그 객체에 값을 넣어줘야함 ㄴ> HTTP Body 내용과 HTTP 파라미터의 값들을 Getter, Setter, 생성자를 통해 주입하기 위해 사용 ㄴ> 일반 변수의 경우 전달이 불가능하기 때문에 model 객체를 통해서 전달해야 한다.
* 참고 @RequestParam을 사용해서 값을 받고, set을 사용해서 값을 넣어주곤 하지만 이 과정을 자동화시켜주는 것이 @ModelAttribute이다.
★ 정리 ★ model.addAttribute("String name", Object value) ㄴ> value 객체를 name 이름으로 추가함 model.addAttribute(Object value) ㄴ> value객체를 추가함. 단순 클래스 이름을 모델이름으로 사용(소문자로)
★ 예시 ★
@ModelAttribute 사용 x 경우
ㄴ> @RequestParam을 통해 요청 파라미터를 받음
ㄴ> 하나씩 받아서 set을 해줘야 값이 저장됨
public void item(@RequestParam String name, @RequestParam int price, Model model){
    Item item = new Item();
    item.setName(name);
    item.setPrice(price);
    model.addAttribute("item", item);
}
@ModelAttribute 사용
ㄴ> 요청 파라미터의 이름으로 Item 객체의 프로퍼티를 찾는다.
ㄴ> 해당 프로퍼티의 setter를 호출해서 파라미터 값을 입력한다.
ㄴ> model.addAttribute도 생략 가능 @ModelAttribute를 사용함으로써 model에도 자동적으로 객체가 추가 되기 때문
public void modelAttributeEx(@ModelAttribute Item item, Model model){
	model.addAttribute("item", item);
}
★ 예제1 ★
< Member.java >
package org.zerock.controller;

import lombok.Data;

@Data
public class Member {

	private String id;
	private String pass;

}
<SimpleController.java >
package org.zerock.controller;

import javax.servlet.http.HttpServletRequest;

import org.slf4j.Logger;
import org.slf4j.LoggerFactory;
import org.springframework.stereotype.Controller;
import org.springframework.ui.Model;
import org.springframework.web.bind.annotation.ModelAttribute;
import org.springframework.web.bind.annotation.RequestMapping;

@Controller
public class SimpleController {
	private static final Logger logger = LoggerFactory.getLogger(SimpleController.class);

    @RequestMapping("doD")
	public String doDget(Model model) { // 메소드에 넣으면 자동적으로 초기화됨
		logger.info("==doD get==");

		Member m = new Member();
		m.setId("1111");
		m.setPass("2222");

		model.addAttribute(m); // 객체없이 넘길때
		model.addAttribute("m", m); // m이라는 객체를 jsp에서 사용할 수 있는 객체로 넘기겠다

		System.out.println("m.tostring : "+m.toString());

		return "index"; // return 이 있다면 return의 값.jsp로 forward
	}
}


======= console ==========
m.tostring : Member(id=1111, pass=2222)
< index.jsp >
<%@ page language="java" contentType="text/html; charset=UTF-8" pageEncoding="UTF-8"%>

<!DOCTYPE html>
<html>
<head>
<meta charset="UTF-8">
<title>Insert title here</title>
</head>
<body>
<!-- model.addAttribute("m", m); 로 했을 때 -->
m.id = ${m.id } <br>
m.pass = ${m.pass} <br>
==================================== <br>
<!-- model.addAttribute(m); 로 했을 때 : 알아서 Member 객체의 소문자로 객체를 지정해줌(member) -->
member.id = ${member.id } <br>
member.pass = ${member.pass} <br>

</body>
</html>
★ 예제2 ★
< ProductVO.java >
package org.zerock.controller;

import lombok.Data;

@Data
public class ProductVO {

	private int price; //상품가격
	private String name; //상품명
}
<SimpleController.java >
package org.zerock.controller;

import javax.servlet.http.HttpServletRequest;

import org.slf4j.Logger;
import org.slf4j.LoggerFactory;
import org.springframework.stereotype.Controller;
import org.springframework.ui.Model;
import org.springframework.web.bind.annotation.ModelAttribute;
import org.springframework.web.bind.annotation.RequestMapping;

@Controller
public class SimpleController {

	private static final Logger logger = LoggerFactory.getLogger(SimpleController.class);

	@RequestMapping("doD")
	public String doDget(Model model) { // 메소드에 넣으면 자동적으로 초기화됨
		logger.info("==doD get==");

		ProductVO p = new ProductVO();
		p.setPrice(2000);
		p.setName("고구마");

		model.addAttribute(p);
		model.addAttribute("p", p); // 객체, 변수

		return "index"; // return 이 있다면 return의 값.jsp로 forward
	}


}